Jump to the InstaRecipe if you’re in a rush and/or don’t want any Dad Advice!
November 19. Dear Kids- I grew up eating “stuffing”, not “dressing”, at Thanksgiving, with a recipe that went back to the very first Thanksgiving your Granny prepared as a newlywed for her mother and father in law- your very stern and conservative great grandparents. Granny’s preparations for the big day were going well until Granny realized she was missing the band-aid she put on a finger she cut while chopping onions for the stuffing. Fortunately, Granny was able to spot the band-aid at the last minute in the stuffing bowl at the table and, being quick on her feet, was smart enough to serve the stuffing from its bowl and individually onto each of the plates to help get “everyone started”. Not only did the inlaws think this was a nice touch, it also allowed Granny to serve around the band-aid, leaving it for the serving on her plate, where she quickly and covertly dispatched of it when the time was right. I’m not sure that such a technique would have received the Good Housekeeping seal of a approval, but it did save the day and it’s a good lesson to remember so you don’t get too stressed out about mishaps you may experience in your Young Adult Kitchen.
As it would turn out, that stuffing (without the band aid, of course) was very similar to the stuffing Mom was eating in her childhood home. A simple, but delicious mix of countertop-dried bread cubes (we weren’t spending money on the expensive store bought bread cubes that fill grocery shelves around Thanksgiving), onions, celery, Poultry Seasoning and chicken broth- with Mom’s side throwing in a pound or so of pork sausage for good measure.
Mom stayed true to her family Thanksgiving stuffing recipe, adding a lot more celery and Poultry Season than one could imagine, once she struck out for her own kitchen, while I was all over the place, experimenting with many types of stuffing- like seafood, cornbread and wild rice to name a few- during my early kitchen days. Once we started our family, it was clear that the stuffing Mom grew up on would be the stuffing you two would grow up on. By that time, the stuffing also turned into dressing (the only difference being that it was not stuffed into the turkey carcass, but cooked in a side pan) because your parents and many others learned that stuffing a turkey with a savory bread mix wasn’t necessarily good for the turkey (at least it’s meat anyway) or, more importantly, necessarily safe for young or old eaters alike. In any event, you both were very happy with our choice of dressing, at least up until the point one of you decided to become pescetarian. Still, it was an easy pivot, at least as far as the stuffing was concerned- the exact same recipe I had been making for years, with veggie broth for the chicken broth and the sausage being left out or swapped out for some sautéed vegetables, for a second, meat free, batch of dressing at our T-Day Table.
Now it’s time for you to decide whether you will take your childhood Thanksgiving dressing forward, tweak it a bit or try something entirely new and trendy as your dressing of choice in your Young Adult Thanksgiving Kitchen.
Prep Time: 30 minutes
Cook Time: 30 minutes to dry bread, 45 minutes to cook dressing
Servings: 6-8
Get Your Stuffing Out.
- 1 loaf (about 24 ounces) of good quality white bread
- 3 tablespoons canola oil or cow or plant butter
- 2 large onions, diced
- kosher salt and fresh cracked pepper to taste
- 6 large stalks of celery, trimmed and diced, but a lot more if mom’s in charge
- 1 tablespoon of Poultry Seasoning, but a lot more if mom’s in charge
- 8-12 ounces chopped cremini mushrooms, peeled and diced Granny Smith apple or two and 4 cups stemmed and shredded kale for plant eaters or 1 pound ground pork for the meat-eaters at the table, optional
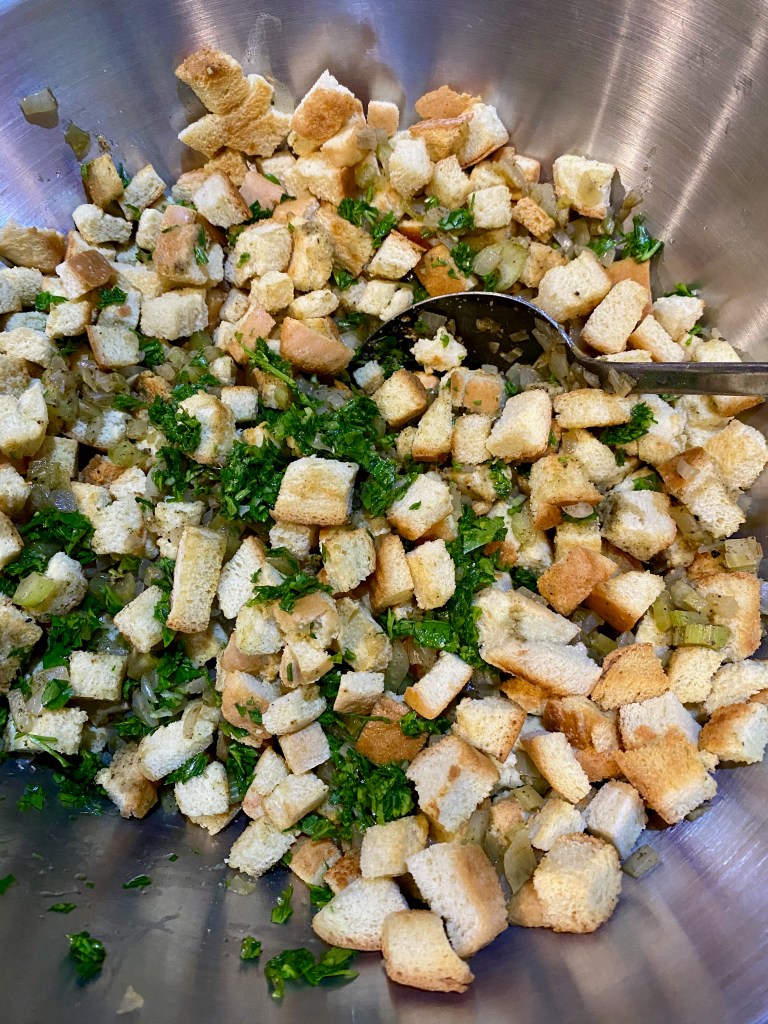
- 1/4 cup parsley, minced- optional
- 4 cups, give or take, vegetable or chicken broth
- more oil, butter or vegan butter
Cook and Play.
Play Aubrey by Bread, a song to which I would pine away when I was an awkward teen, but make sure your bread doesn’t turn into a sad song you can’t make better.
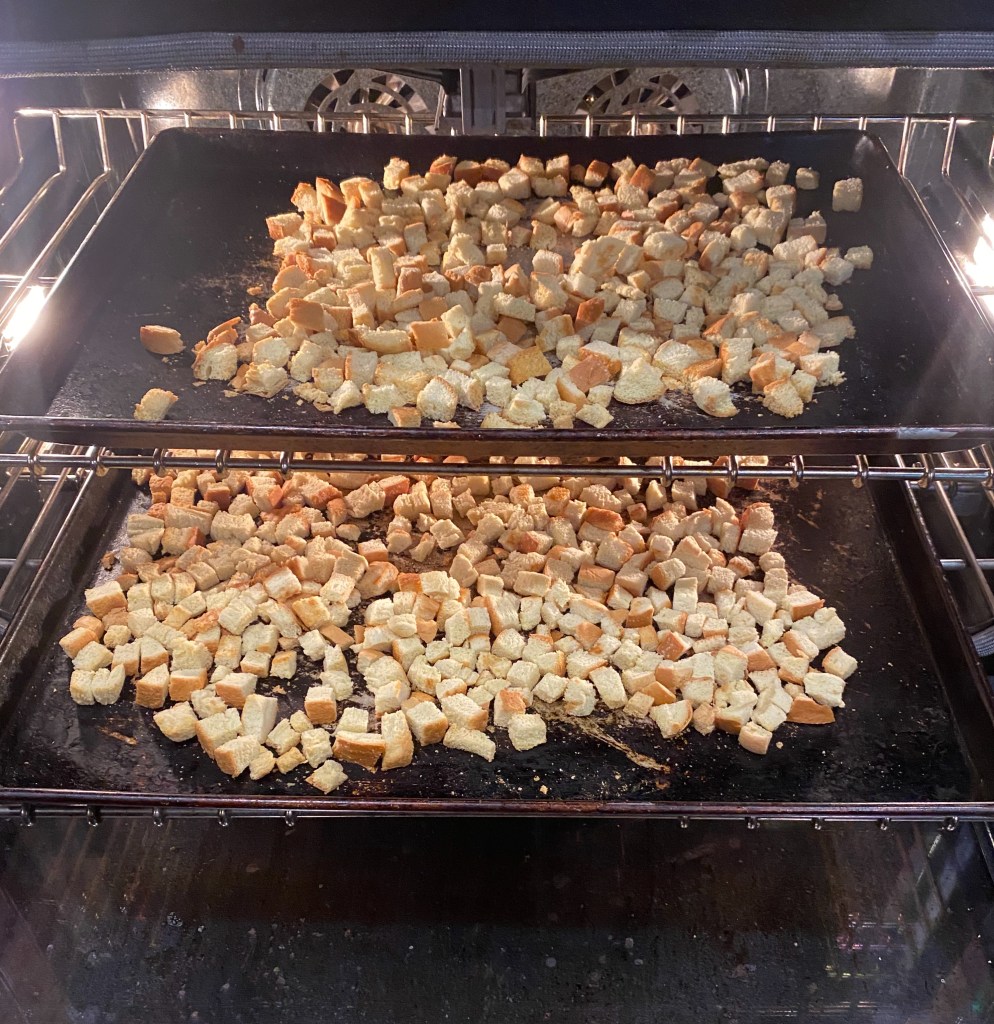
1. Cutting Bread Cubes. Set up lower and upper middle oven racks and set oven to 325°. Cut bread into a 1′ cubes- it’s so much fun to cut bread cubes with an electric knife, but you would need to be very old or kitchen nerdy to have an electric knife. For a more rustic look and feel, you can tear your bread into 1″ shards if you like.
2. Don’t Burn Your Bread! Spread bread pieces in a single layer on a large baking sheet (use two sheets or toast in batches if you can’t fit them all on one sheet) and toast in oven, tossing with a spatula a few times until bread is dry and starting to brown, about 15-30 minutes- all ovens are a bit different so keep an eye out so you don’t burn your bread and make yourself sad. Set toasted bread aside.
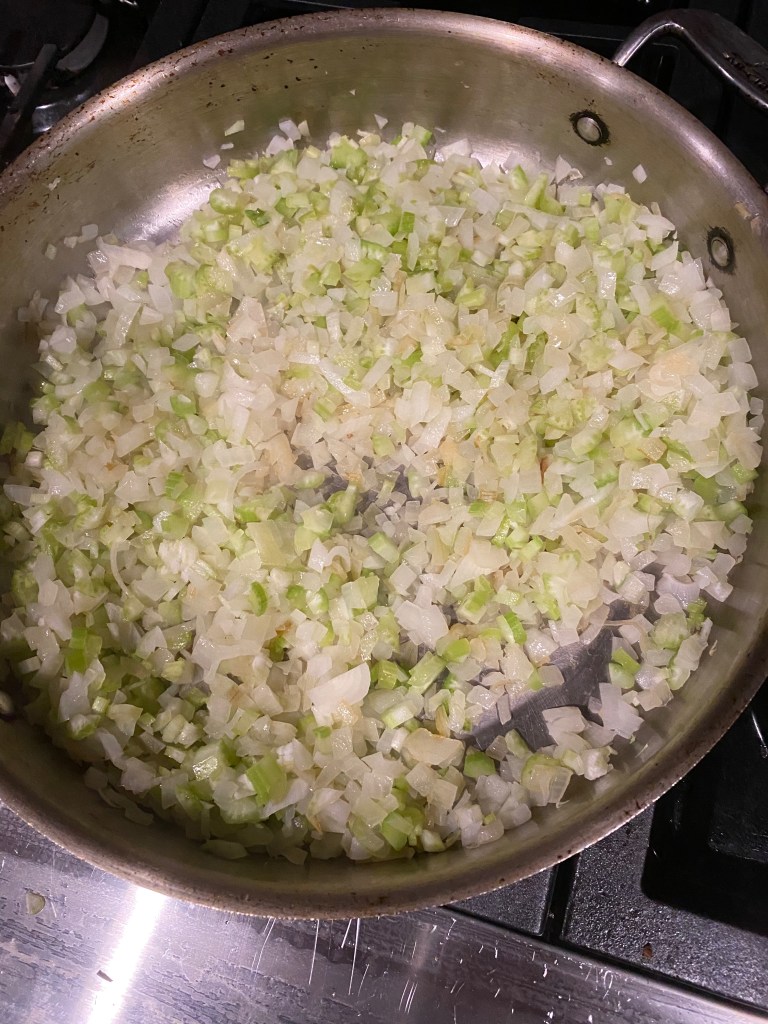
3. Flavor Base. While you are keeping an eye on your bread so it doesn’t burn, preheat a large sauté pan over medium heat, add oil or butter and sauté onions with a 1 teaspoon kosher salt and 1/2 teaspoon freshly cracked black pepper or to taste. Once the onions start to soften, add celery and Poultry Seasoning and cook until celery starts to soften and onions starts to brown. Dad Confession- I often use a lot more butter in this step.
4. Flavor Boosters. If you want a bit more flavor, add either the mushrooms, apple and kale or sausage into the onions and celery. Cook mushroom until mushrooms have given up most of their moisture and are golden brown and then stir in apple and kale to cook until kale wilts or cook pork until starting to brown, breaking it up as it cooks, and until fully cooked with no pink pieces remaining in the mix.
5. Not Too Dry, Not Too Soggy- Just Right! Get a very big bowl that will let you comfortably toss toasted bread, sautéed onion and celery mix and parsley, if using, and toss it all to combine. Stir in a few cups of broth. Continue to add broth, bit by bit (up to 4 or so cups) and stir, until you get a tender, but not soggy consistency to the dressing- not too dry and not too wet- you want it just right Goldilocks! Taste for seasoning and add more salt, pepper and/or Poultry Seasoning to taste.
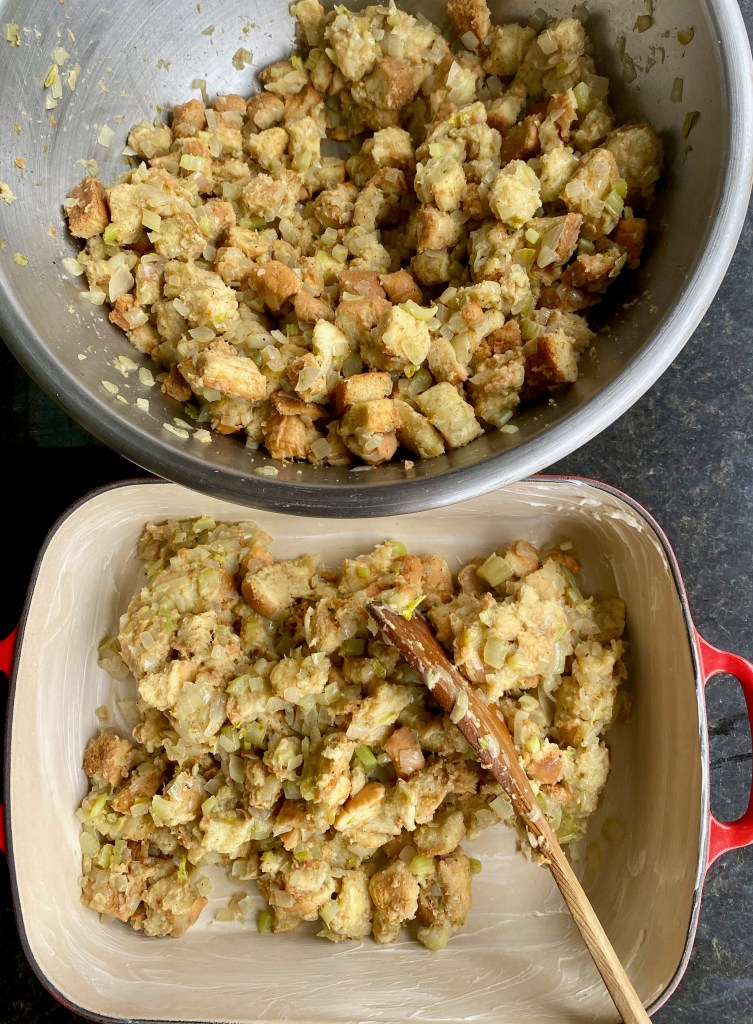
6. Get It In The Pan, Pop! Evenly coat a 13” x 9” baking pan with cow or plant butter and spoon dressing mix into pan. Cover with tin foil that is lightly coated with an even layer of cow or plant butter (butter side down) and refrigerate, up to a few days, until ready to cook. Cook in a 375°oven until middle of dressing is 165°- about 45-60 minutes- then remove cover and crank oven to 425° to crisp up topping as you like, about 15 minutes or so and keeping an eye out so it doesn’t burn to bitter.
THE LECTURE
What Is Good White Bread? I’ve always used a sturdy, quality white bread, like Arnold’s Country White or Pepperidge Farms Farmhouse Hearty White- a bit of blank canvas, with a tight crumb (no big holes like sourdough or ciabatta) to soak up all the flavors added to the dressing. I stack up about 10 slices and use a serrated bread knife or electric knife (because I’m that old to have one) to cut a grid of 1” cubes, vertically and horizontally through the bread. For the more free spirited of you, just tear up the bread into 1″ shards and you’re good to go. Some folks use similarly textured, but richer and more expensive breads, like brioche (very trendy these days) or challah, but who needs the higher price tag and the extra richness and heaviness from the added eggs and fat in the those types of breads when there’s no shortage of that on a Thanksgiving plate? Speaking of eggs- you see a lot of dressings with added eggs, but I don’t use them and never miss them for the same reason.
As long as we’re talking about bread, Granny and, for a long time, I would dry out stuffing/dressing bread on the counter, but then it dawned on me that all I was making by doing that was stale bread when I could have been making toast- and we all know toast is way better to eat than stale bread. Toasting the bread in the oven also has the benefit of protecting it from food seeking labs or other such hungry pests as we certainly learned after we lost half a tray of countertop stale bread to one of our beloved black labs, Wizard- a taller dog would have taken out the entire tray I’m sure. Another word of warning, if you hold the toasted crumbs in the cooled oven after you toast them, tape a note on the oven so someone doesn’t preheat the oven to make a pie without checking the oven and burns your bread because of it- not naming names (GM and The Eldest).
Fresh Herbs. While Poultry Seasoning is certainly economical, if not for Mom, I would occasionally use fresh herbs instead of Poultry Seasoning for our Thanksgiving dressing, but you know how Mom can be when it comes to her Food Favorites:). If you wanted to try out fresh herbs, don’t tell Mom, and substitute 1/4 cup minced fresh parsley, 1-2 tablespoons minced fresh sage, 1-2 tablespoons minced fresh thyme leaves and 1 tablespoon minced fresh rosemary for the Poultry Seasoning in this recipe.
Why We Shouldn’t Stuff A Turkey. It may not matter to you two plant eaters, but when I was a kid, food science and moist white meat were in their infancy, so everyone stuffed their turkey with the savory bread pudding, aptly called “stuffing”, with no worries about foodborne illnesses or bone dry white meat- after all, I imagine we would be told, “That’s why God invented bathrooms/emergency rooms and gravy!”. As food science and good meat cookery evolved, it became more common pace to cook your savory bread separately and call it “dressing” so it could be prepared safely and without drying out the white meat of the turkey. Nevertheless, in spite of my need to be precise about this, most people and recipes use the terms interchangeably.
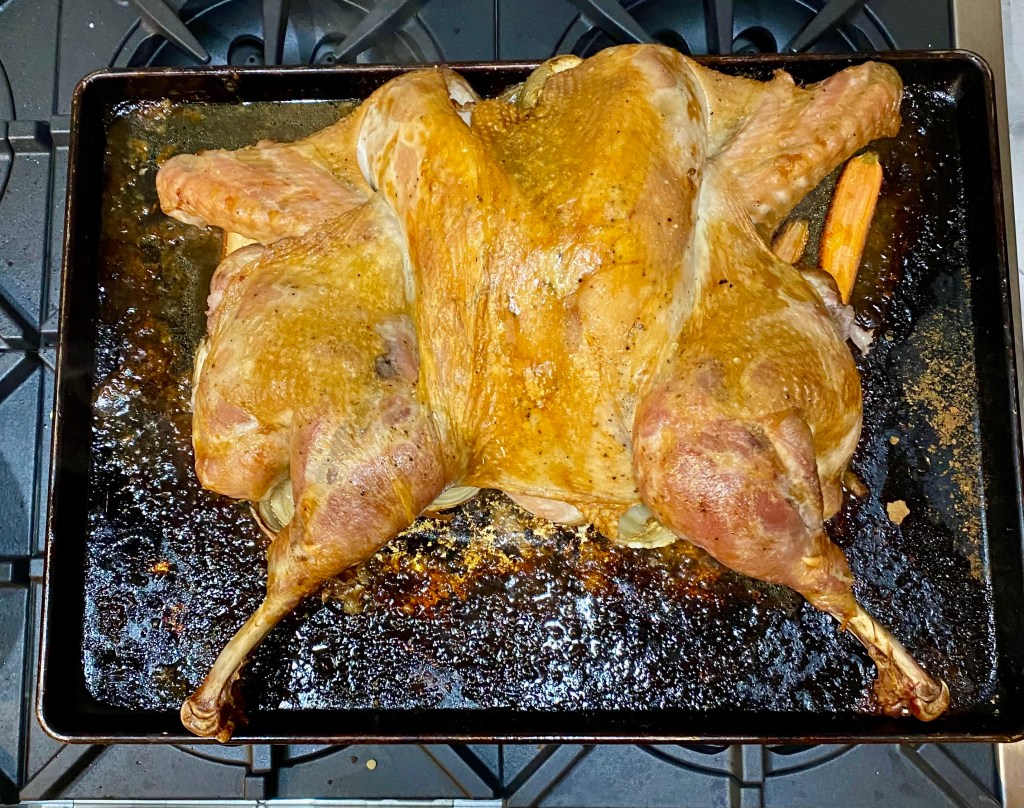
Modern Turkey “Stuffing”. If you were cooking for some meat eaters, I suppose you could safely “stuff” a turkey and receive the benefits of the drippings to enhance the stuffing, without over cooking the white meat. To do this, you or your friendly neighborhood butcher would “butterfly” or “spatchcock” the turkey (cut the backbone out of it and splay it flat like a butterfly- yeah, sounds like a job for a butcher), layer the stuffing on a buttered sheet pan large enough to hold the split turkey, cover the stuffing with the turkey and cook on the center rack of a 350° oven until the internal temperature of the middle of the thickest part of the breasts, thighs and legs of the turkey and middle of the stuffing is the government recommended 165°. Stay tuned for next year’s Thanksgiving posts for more details.
© 2021 All rights reserved. Dad’s Dinner Diary
