
The Official Dad Dinner Diary Has Begun!
October 24. Dear Kids- Over the semester I’ve enjoyed hearing of the good fortune and bounty one of you enjoy from having a housemate who works part time at a farm. Presently, this has provided your house with a bounty of green tomatoes- the wonderfully, tart hidden gems found in so many gardens this time of year. So when you called for my Fried Green Tomato Recipe, after ignoring green tomatoes your entire life- even when we lived down south- I was thrilled!
I threw in a fresh tomato salad, at no extra charge, to add a little healthy and round it out into more of significant starter or even a light a meal. I almost feel bad about deep frying these beauties, but I might lose my Old School Dad Card if I passed up the opportunity to fry anything. As for the sensitive, modern dad part of me, I would love to see you take some green tomatoes and slice them very thin, to add to a variety of thinly sliced heirloom tomatoes for a beautiful salad or use them in a fresh or roasted salsa, but for now, we’re sticking to frying them up!
Prep Time: 25 minutes (plus 30 minutes of passive prep if you have the time)
Cook Time: 20 minutes, although I don’t like giving cooking times
Preheat: Oven to 200 degrees (middle rack), to hold fried tomatoes, if you must.
Servings: 4
Special Dad Note: Listen kids, I know you are not always up to hearing me blather on about how you should do things, but you should really check out my frying advice in The Lecture (formerly “TMI”) since frying can be fraught with mistakes and danger! Cue the suspenseful music!
GET YOUR STUFF OUT.
Fried Green Tomatoes
- 4 medium green tomatoes, about 7 ounces each
- 1-2 teaspoons kosher salt
- 1/2 cup all purpose flour
- 1 tablespoon Fry Spice Mix (1 teaspoon kosher salt, 1 teaspoon onion powder, 1/2 teaspoon garlic powder, 1/4 teaspoon cracked pepper, 1/4 teaspoon cayenne pepper)
- 10 to 12 ounces of beer or club soda for vegan batter breading
- 3 cups panko bread crumbs
- 2 tablespoons of grated parmesan cheese or nutritional yeast
- 1 cup or more canola oil, for pan frying
Tomato Salad
- 8 ounces baby arugula
- 1 pint of multicolored grape tomatoes, halved or quartered, depending on size
- 1/2 lemon
- 1-2 tablespoons extra virgin olive oil
- kosher salt and cracked pepper to taste
Not So Secret Spicy Sauce (formerly Secret Spicy Sauce)
- 1/2 cup of Ranch Dressing (Light Ranch or Vegan Mayo works as well)
- 1-2 teaspoons of Sriracha

Cook and Play
Crank up Tomato Head by Shonen Knife and get to fryin’. The song and video are a bit bizarre; from an all-female Japanese pop-punk band formed in Osaka, Japan, in 1981- right during The Mom’s high school punk phase.
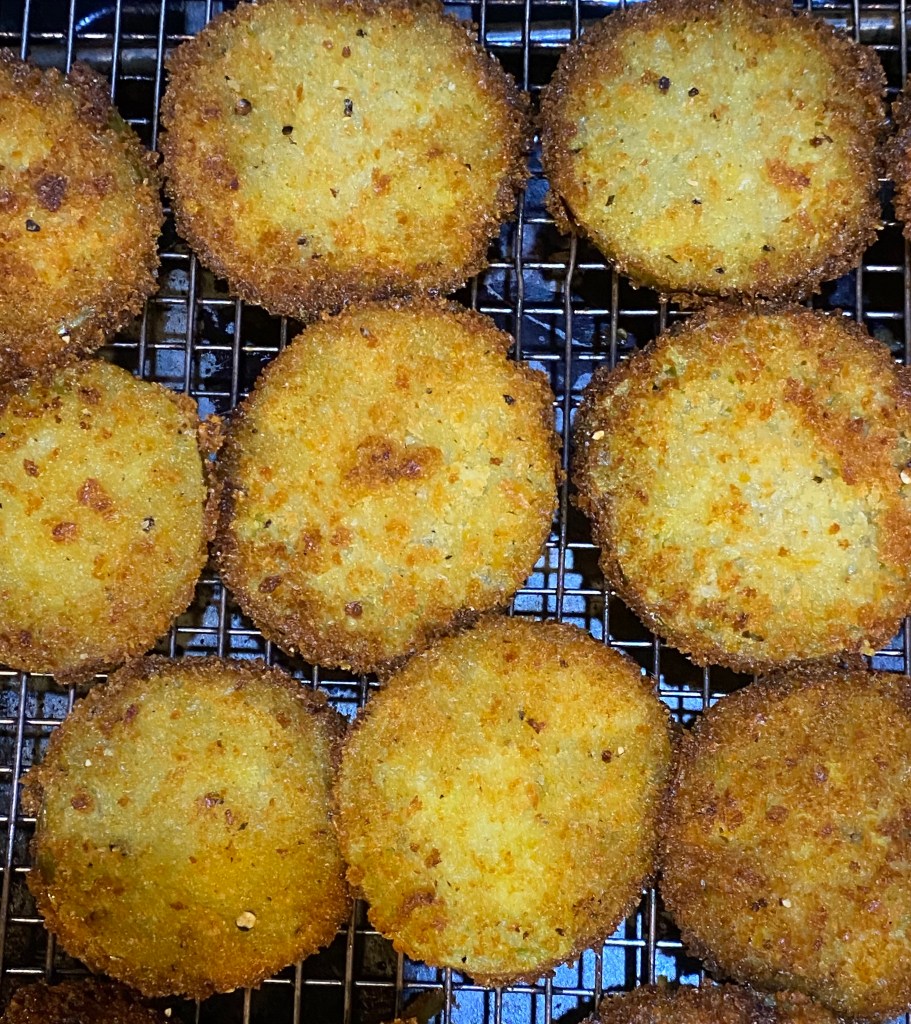
Fried Green Tomatoes
Breading.
- Remove tough stem section of each tomato by making a shallow cone cut around the tough area and then slice each tomato into 1/2 inch horizontal cross sections- you should have at least 4 nice flat, center cut cross sections and two, curved “nub” ends for each tomato.
- Set up a wire rack in a large sheet pan (“Sheet Rack”), toss tomatoes with 1/2 teaspoon kosher salt and let sit on rack for an hour or so, if you have the time, to concentrate flavors. Wipe tomatoes and sheet rack dry with a kitchen towel before breading.
- In a medium bowl, mix 1/2 cup of all purpose flour with 1 tablespoon of Fry Spice Mix (1 teaspoon kosher salt, 1 teaspoon onion powder, 1/2 teaspoon garlic powder, 1/4 teaspoon cracked pepper, 1/4 teaspoon cayenne pepper).
- Make your Batter Bowl by mixing 10 to 12 ounces of beer or club soda in the seasoned flour until you have a nice smooth batter that is the consistency of pancake batter.
- Make your Crumb Bowl by mixing up 3 cups of panko bread crumbs and 2 tablespoons of grated Parmesan or Nooch (nutritional yeast) in a large bowl.
- Stick a tomato slice with a fork, dip it in the Batter Bowl and allow the access batter to drip back into the bowl.
- Toss the battered slice (sounds like the slice is in an abusive relationship!) into the Crumb Bowl and press on more crumbs on each side as needed. Return breaded slice to Sheet Rack.
- Repeat for the rest of the tomatoes. If you have the time, leave the tomatoes on the counter for about 30 minutes so that the breading can set up.

Frying.
- Let’s get this out of the way up front- you will be frying in batches so you don’t over crowd your pan and lose your crisp.
- Heat one cup or more of canola oil, so that the oil will run half way up the slices, in a large frying pan over medium high heat until the oil reaches 350 degrees.
- Use that fork again to stick and gently lay the breaded tomato slice into the hot oil. Add more slices, but don’t overcrowd the pan or you’ll be sad. Fry, adjusting the heat when necessary, until the fry side is golden brown. Then carefully turn to brown the other side, about 3-5 minutes a side.
- You can use that fork one last time to get your fried tomatoes out of the pan and onto some paper towels to dab up the surface oil. Set fried tomato on the rack over the sheet pan so they stay crisp. Repeat until all tomatoes are golden brown and crispy good.
Tomato Salad
In a large bowl, toss 8 ounces of arugula, 1 pint of halved grape tomatoes, juice of half a lemon, 1-2 tablespoons extra virgin olive oil and kosher salt and cracked pepper to taste.
Not So Secret Spicy Sauce (formerly Secret Spicy Sauce)
Just mix 1/2 cup of ranch dressing (light dressing or vegan mayo works too) and 1-2 teaspoons of sriracha in a small bowl. This is not difficult- you’ll only be getting a Participation Medal for this part of the recipe.
The Set Up.
Place a serving of the dressed salad on a dinner plate, thoughtfully arrange 4-5 fried tomatoes along the salad and drizzle with Not So Secret Spicy Sauce.

THE LECTURE
The Dad Joke. This recipe is no joke!
The Key To The Recipe. Proper heat management to keep the oil at 350 degrees and using a Sheet Rack so your tomatoes don’t get soggy.
Special Equipment. Infrared Thermometer. This is such an awesome dad tool- you shoot it like a ray gun (heck, it almost looks like a phaser from Star Trek!) and it bounces rays off your target to give you its surface temperature. This works well with oil, since the surface temperature is close enough to the rest of its temperature to give you good data. There are candy and clip on fry thermometers too, but they don’t help with a shallow fry and why on earth would you use these when you can use a ray gun! Not to mention so many other other uses for the infrared thermometer- zap that microwaved soup to see if it’s too hot or cold, check the temperature of a pan to make sure it’s hot enough for searing, see just how hot your pizza stone can get and the list goes on. That’s it, I’m getting you both one for Christmas!
Ingredients of Note. Green Tomatoes. We’ve lived the majority of our time “up north” and have been able to find green tomatoes year round, but they are certainly more prevalent in the fall. Also, as many cookbooks are quick to point out, tomatillos are not green tomatoes, but I will say they share a similar tangy bite and see no issue swapping the two in a salsa if you wanted to give that a try. You might even be able to make a cool looking Bloody Mary (FYI- there are lizards that have green blood), but I don’t really want you to drink while you’re at school. Fry Spice Mix. You could certainly make a big batch of this to store in an airtight container- it not only works great to season flour for frying, but it’s a good all purpose seasoning too. Feel free to adjust the ratio or add some spices or dried herbs of your liking. Yes, I cheated and used Tony Chachere’s, a creole spice mix to season my flour for this post. I found Tony C’s during a Mardi Gras trip with 5 of my friends before I met your mother, but I can’t tell you any more about that until you’re much older and mom isn’t around- JK, we were all very well behaved.
Let’s Get This Breading! Here’s another earth shattering discovery I made while cooking vegan- who needs the traditional 3 bowl breading set up to coat fried foods when you can save the time and mess of an extra bowl by going vegan with just a Batter Bowl and Crumb Bowl! The Crumb Bowl Flip. Just so you know, there’s a cool and clean way to toss your food in the Crumb Bowl too! Once you drop your food into the crumb bowl, pick up the bowl with one hand and gently push it forward and quickly pull it back so that the battered food flips over in the bowl to coat all sides- that’s why the crumbs should be in a large bowl for ease of flipping. If you master this, you won’t have to use your hands to coat the wet food, which often causes battered and crumby hands- nobody wants that- think The Thing from the Fantastic Four. The trick here, is to be quick and careful enough so that the crumbs don’t go flying out of the bowl. It may take some time and dirty floors, but you’ll figure it out in no time. Once you have a base coat of crumbs with your flip, you can hand press on more crumbs if need be, but the food will be mostly coated so the crumbs won’t stick to your hands. Old School Breading. Just in case you’re low on beer, which probably never happens in college, and want to save your club soda for cocktails (What did I say about drinking?!), you can go with the traditional three bowl set up. In this recipe, you would dust up your tomato slice in a seasoned flour bowl, toss the floured slice in the egg wash bowl (just a couple eggs mixed up in a bowl) and toss the egg drenched slice in the Crumb Bowl.

The Fry Station. How exciting, you can now have your very own Fry Station- I hope this makes up for me never getting either of you an Easy Bake Oven when you were younger. The Set Up. Turn your oven to 200 degrees before you get to frying if you want to keep your food warm after it is fried and until it is served. Your frying pan on the stove will obviously be the focal point of the frying station. Set the pan on the far left or right burner so there is room for a Sheet Rack on the empty part of the stove and another Sheet Rack on the counter next to the burner you are using. Hopefully you have room for this! One Sheet Rack will hold the breaded food and the other Sheet Rack, with a few paper towels on its top half, will be the landing spot for the fried food. Place a small dish of finishing salt nearby, if you’re into that sort of thing. After the food is fried, blot if off on the paper towels (replacing as needed), move if down to the bottom of the Sheet Rack that is not papered and hit it with a pinch or two of salt if you like. The fried delights should not sit on the paper towels so keep this in mind while frying. If not serving immediately, place the Sheet Rack with the fried food in oven to hold for the next batch or serving, but the longer in the oven, the less crisp it will be. If you’re short on Sheet Racks or space, you can still make the recipe with large plates or platters in place of the racks with solid results.

How To Fry Without Injury or Property Damage. The shallow fry is the best way to get started in the frying world because you don’t need to worry about a massive amount of hot grease while you’re learning to fry. You should use a neutral oil with a high smoking point, because I don’t want you smoking while you’re away at college either and smoking oil can lead to fire, so there’s that too. I typically use canola oil. After that, the key is temperature control so the oil stays at the temperature called for in the recipe; otherwise, your food and kitchen may burn from too high of a heat or your food will become oily, bland and limp from too low a heat. Judging Temperature Without a Thermometer. You clearly should be using an infrared thermometer for this, but if you elect to be cheap and live on the edge, you are going to have to use your senses to at least get close to the proper temperature. A medium to medium high heat is a good place to start (the more oil, the longer it will take to get to temperature) and then you go to your senses- if you see the oil smoking, turn it down; if the oil doesn’t react with a nice, steady bubble when you gently place your food into it, turn it up or if it practically explodes when you put the food in, take it off the heat and turn it down; and if you are getting a burnt smell or see the fry side is turning dark quickly, turn it down or if the crust it too light, turn it up. Some folks like to fry a small piece of bread to check on the heat. Temperature Control Strategies. 1. Bring the food to room temp before frying so there is less of a temperature drop when you add it to the hotter oil. 2. Start the oil a bit hotter than the temperature called for in the recipe to help account for the temperature drop when the food is added. 3. Fry in batches if there’s too much food for one pan. If you add too much food to the pan, the oil temp will take too big a hit and your food will become saturated with oil before the oil temperature fully recovers to the proper temperature. 4. Once the food begins to cook and its temperature rises, it may be necessary to turn down the heat a bit to account for this. Adding The Food. Finally, be very careful when putting your food in hot oil- high drops, bad releases (release food away from you so any hot oil splash is also away from you) and surface water (in this recipe, the breading takes care of that) will likely burn you! Also, you should know water and hot oil don’t mix- they fight and splatter and can make a dangerous mess- so make sure your food has no surface moisture by patting it dry or applying a batter or crumb and don’t you dare put water on an oil fire!
This Day In Dad History. Wednesday, October 24, 2007. Youngest child helped dad pack up mom for a business trip before school started. Dad was also proud of big sibling for looking out for little sibling with a warning not to buy the day’s school lunch of lasagna because it was “too cheesy”. After three trips to the school book fair with youngest, dad was able to negotiate getting a Level 1 Reading book, Comfort Me with Apples, if he threw in a Pokemon sticker book to sweeten the deal. I surprised both kids with an after school pick up, that included GM, for a trip to visit a sick horse and play with some foals. That was followed by dinner at the snazzy, new Rock and Roll Diner. We played a new food waiting game that had you two studying a picture, then taking it away to see how many questions about the picture you could answer. You thought it was so much fun and, after countless games of I Spy, it was a welcome relief for me! Of course, we called mom to say good night and tell her about your day!
© 2020 All rights reserved. Dad’s Dinner Diary

Yummy!
LikeLiked by 1 person