
October 28, 2021. Dear Kids- There is a split between you when it comes to my “Pasta alla Schwarzenegger” (aka “Linguini With Mussels”- save some of your groaning from this Dad Joke for the Cook & Play too!)- one, happy to slurp up a bowl of this pasta tossed with mussels in a briny, garlicky broth; the other, not so much. That would put the latter of you in the minority of this family, who has a love of mussels that goes back about half a century ago. This is when Poppies “discovered” mussels and cautioned everyone around him, each time he ate mussels, not to tell anyone else about “the best kept secret” in food.
Your grandfather’s connection with these relatively unknown inexpensive and delicious seafood nuggets, that he was sure would eclipse the popular mollusks of the day-clams and oysters-, was also well ahead of the time when mussels started to proliferate on restaurant menus and won the hearts and stomachs of diners all across the US.
Since then, mussels have been prepared in many different ways and with many different flavors, but there’s nothing like this clean and simple recipe to showcase the wonderful flavors of the sea that mussels bring to the table.
Diet: Pescatarian
Prep Time: 15 minutes, longer if your mussels are very dirty and “beardy”
Cook Time: 15 minutes
Servings: 4
GET YOUR STUFF OUT
- 1 pound linguini
- 2 tablespoons of canola oil or unsalted butter
- 1 cup minced onion of choice, like yellow, shallot, leek
- kosher salt, to taste
- 1 cup minced celery
- 1/2 cup finely minced fennel, optional
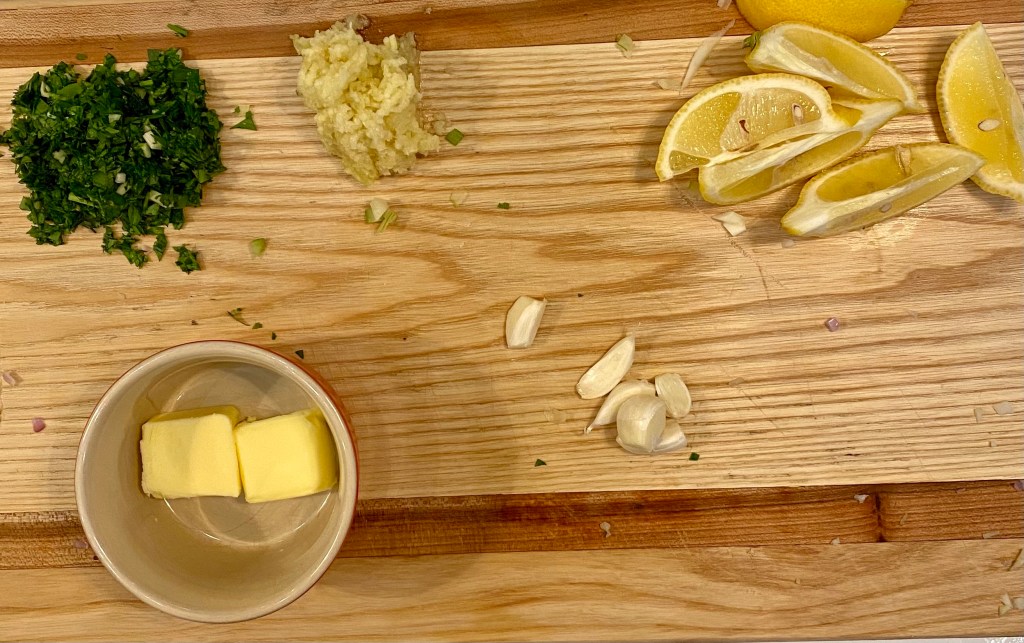
- 4-8 garlic cloves, grated or minced
- 1 cup dry white wine, like sauvignon blanc
- 3-4 pounds of scrubbed and debearded mussels, PEI mussels are my favorite
- fresh lemon juice, to taste
- 1/2 cup minced parsley and or dill
- red pepper flakes, optional
- Toasted Baguette, optional, but not really because you need to soak up that amazing broth from the sea (recipe in The Lecture)

COOK & PLAY
This one’s almost too easy- play “Muscles” by the legendary Diana Ross, and get to working out those mussels in the kitchen.
1. Pasta Pot. Get a big pot of salted water to a boil and set aside 1lb. linguini to cook to al dente in Step 3.
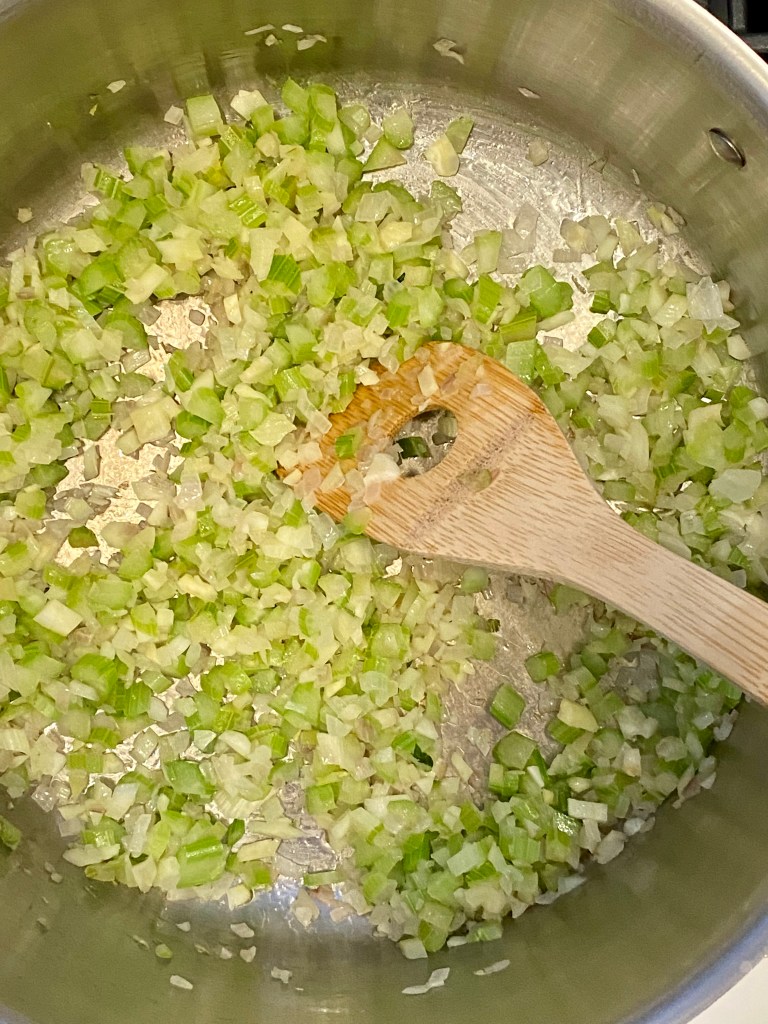
2. Mussel Pot. Get a big pot that has a lid, like a Dutch Oven or pasta pot, set on medium low heat, with 2 tbsp. canola oil or unsalted butter in it. Once the oil is moving, add 1 cup minced yellow onions or shallots, 1 cup minced celery and 1/2 cup minced fennel, if you have it. Cook a few minutes until the veg starts to soften- adjust the heat so you don’t let your veg turn brown or you may make the French angry.
3. Pasta In. Add linguini to pasta pot and bring heat to a simmer to cook to al dente, according to linguini package directions- timing it so your pasta will be done at just about the same time as your mussels.
4. Garlic and Wine- Nothing Wrong With That. Stir in garlic cloves for a quick minute and add wine, which will make the French very happy, and cook that down for a few minutes.
5. Mussels In. Add scrubbed and debearded PEI or other mussels to the pot, adjust heat to a gentle simmer, cover and cook, shaking or stirring the mussels a few times, until mussels just open, about 5-10 minutes. Discard any mussels that remain unopened and stir in fresh herbs into the mussel pot. If you’re looking for a hit of brightness, stir in some fresh lemon zest and juice to taste.
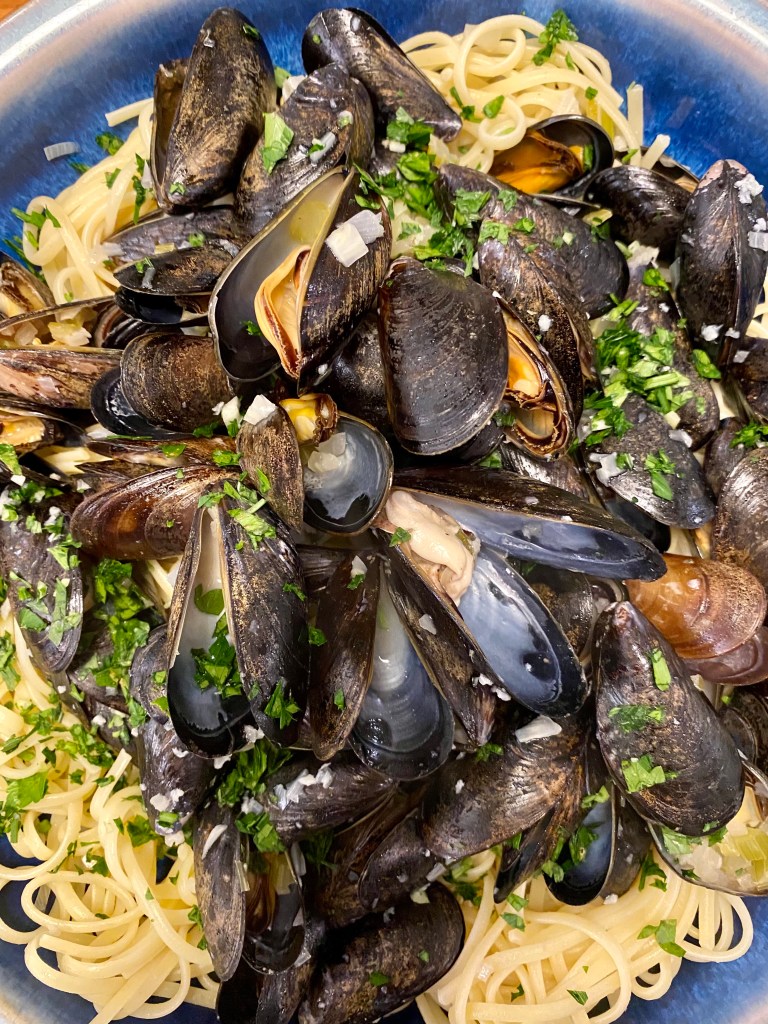
6. Putting It All Together. Strain pasta, dump into serving bowl and top with mussels and broth. If you like, serve with red pepper flakes and a toasted baguette on the side.
THE LECTURE
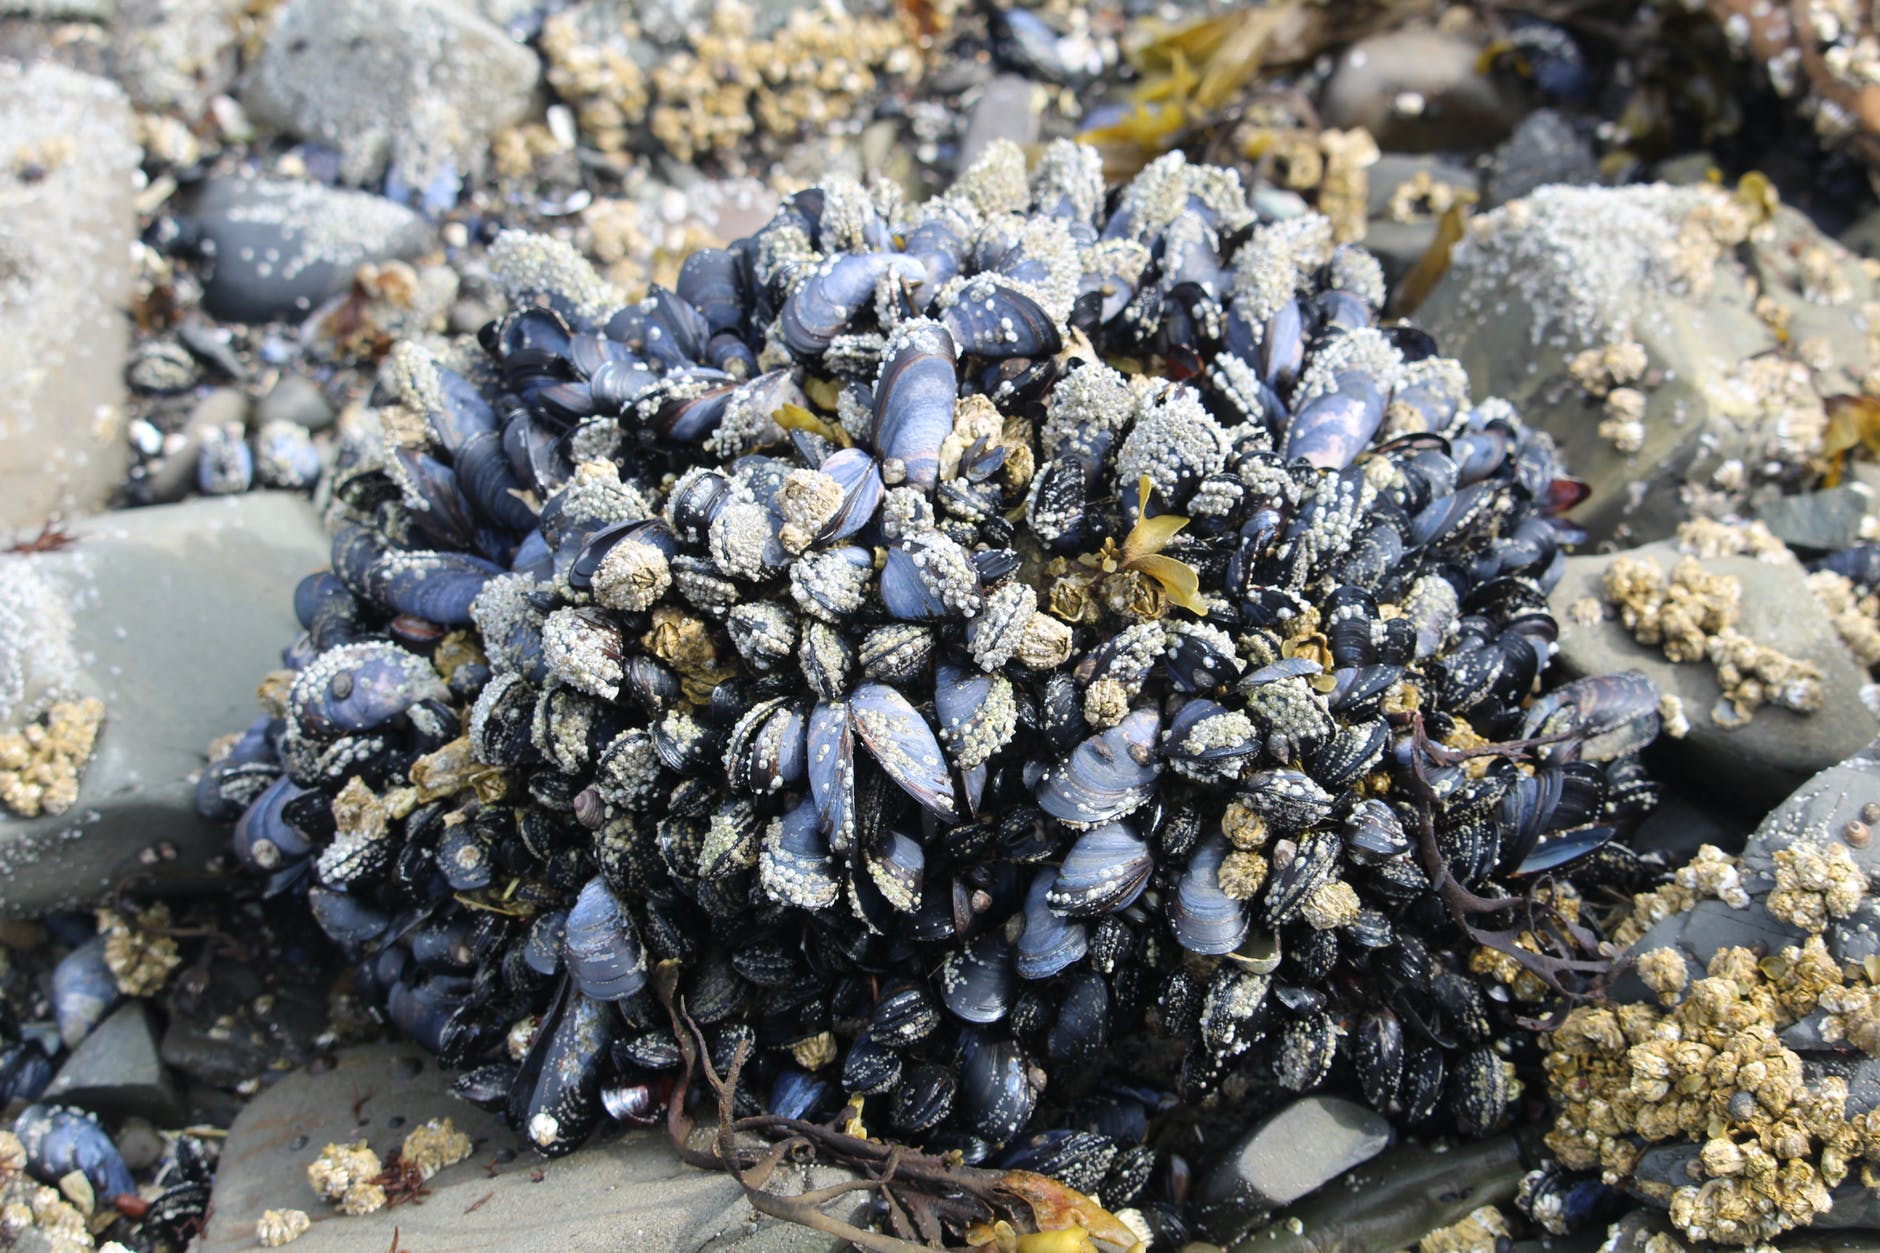
Buying and Storing Mussels. Mussels should be alive when you buy them- glistening and not dull and dry, smell of the fresh sea and not have cracked or open shells. Sometimes live mussels will be open, but should close when lightly tapped or squeezed shut- if one remains open after that, it’s a “Goner”, so throw it out or toss it in your compost. You also want to keep your mussels on life support after you buy them and while you store them so they don’t waste away or dry out because you will lose the delectable broth each mussel carries with it from the sea in its shells. So make sure mussels are not packed for the trip home or stored in your fridge in an airtight bag. Also, keep in mind that while using ice to preserve mussels is a good idea, the mussels can surprisingly drown in fresh water and start to waste away if any of that ice melts and covers the mussels. I like to store mussels in the fridge, uncovered and on ice in a colander or other drainable container placed in a larger bowl or pot that allows water from melting ice to drain into the larger bowl and away from the mussels. Even if you’ve done everything right to this point, you’ll still have some “Goners”, but don’t stress, because it happens to everyone and that’s just how it is. On the brighter side, I’ve had more than one kind fishmonger (“Monger” sounds very impressive and powerful and I’ve always wonder why it’s limited to food titles- also cheesemonger. I considered “kid monger” as an alternative to “stay at home dad” back in the day, but that didn’t test very well.) throw in a few extra mussels because of the invitable Goners in every batch, especially when I politely mention the number of Goners I had the last time I bought mussels from their counter.
Oh Canada! There are a variety of mussel species/brands with, a variety of back stories, you may come across when buying mussels. More popular mussel types are marketed as PEI, Maine, New Zealand and over 90% are farmed/cultivated and not wild. The differences come down to the amount of meat, flavor of the meat and cleanliness of the meat- generally, wild mussels are meatier, heartier in flavor and very dirty. With 90% of the market share, it appears diners and cooks are willing to give up a lot for the cleanliness of cultivated mussels- after all, cleanliness is next to godliness. I have to agree- I don’t care how meaty or flavorful a mussel is, chomping down on sand and grit is a deal breaker for me! Nevertheless, I have tried some cultivated mussels that try to mimic wild mussels by being grown on the bottom of the sea (most cultivated mussels are suspended above the bottom), but that’ where the sand and grit lives and I’ve tried all the hacks to get them free of the same with inconsistent results. On the other hand, I have never even had to use a sand hack on a PEI (Prince Edward Island- it’s in Canada in case you didn’t know) mussel and have never had a speck of grit in the thousands of the PEI mussels I have cooked, so I wholeheartedly recommend you give them a try. I will admit, it has been years since I’ve tried non PEI mussels, so I should and I will, from time to time, try out some other varieties to see what I can see and you should too if you’re curious enough.
Cleaning Up Your Act. Even though cultivated mussels are much cleaner than wild, you will still want to scrub off and rinse cultivated mussels well in any event. There is also the matter of giving a “shave” to the more stylish mussels in your batch, as some mussels (less common in cultivated) develop a bundle of filaments, known as a”beard” (I think it actually looks more like a goatee) as they grow. You don’t want to chomp down on one of these either, but they’re easy to remove- just use a piece of paper towel or a thin kitchen towel to help get a good grip on the tiny and often slippery goatee and, once you have a good grip, give the goatee an enthusiastic yank to remove and discard- wish I could do that with some of these annoying hipsters I come across- not really, it’s a Dad Joke.
You Kids Taught Me The Joy of Black Coffee- That’s Why I Don’t Take My Mussels With Dairy. Long Dad Story Alert. When you kids were old enough to try decaf coffee (13 and 11?), I was still taking my coffee with cream, which seemed very “Dadly” for a Dad who grew up in a British influenced house where coffee and tea were always served with prodigious amount of cream and sugar. So you can imagine my surprise when you each ordered your first cup of coffee black at our neighborhood Dunkin Donuts (this was a while ago, when Starbucks was still cute and cuddly)! I couldn’t believe it. Then, you finished off that black coffee without complaint and I still didn’t believe it; thinking it was only a matter of time before you asked for something more “delicate”. Well, thousands of cups later, it still hasn’t happened and after the first few dozen of your black coffee orders, I started to reevaluate my need for cream- what kind of Dad was I, if my pre teen and young teenage kids were drinking black coffee while I still needed cream? So I switched to black coffee and, yes, at first it had more to do with my idea of “Dadliness”, but then, even after choking down my first black coffee, I started to appreciate all the nuanced coffee flavors that I was missing because of the cream. Sure, we weren’t talking about too many flavors with Dunkin Donut coffee, but I was amazed when my black coffee order was inevitably and often messed up with cream and sugar (with the overwhelming amount of light and sweet coffee orders and poor drive through speaker acoustics, it’s impressive it ever comes out black) how cloying the sweetness of the sugar was and how, well, fat, the fattiness of the cream tasted, with hardly any coffee flavor in each sip. As I moved on from Dunkin coffee to more complex coffees, my appreciation of the variety of flavors (not to mention my appreciation for lower calories and fat) in coffee that wasn’t obscured or obliterated by cream or sugar continued to grow- I don’t think there’s a coffee out there that could be too “strong” for me now. This is the same way I feel about cooking mussels, and chowder for that matter- I want to taste the variety of flavors from the sea and not the fat from butter or, in the case of chowder, the cream. Mussels and clams are especially due this respect since they are good enough to bring you a “broth” from the sea inside their shells at no extra charge. So I would suggest you avoid the temptation that many due to add a stick or two of butter to the broth and appreciate the gentle sea flavors the mussels bring to your table.
Buttering You Up. I realize some, like the older of you, may not enjoy the flavors of the sea as much as I. I also like butter as much as the next Dad and admit the mussel dish I served countless times when I worked in a seafood restaurant in grad school was very popular and was made with a ton of butter, so I won’t object too much to adding butter to the pot if that suits your tastes or particular mood at the time. It’s very easy to do with this recipe too- just cut a stick of butter (or more if your tastes and cholesterol levels allow), into several chunks, and melt each chunk, one at a time, into the pot just before you add the mussels. PS- On the other end of the spectrum, if you really want a pronounced taste of the sea, and I sometimes do, use a slotted spoon to remove the mussels from the pot once they’re cooked and reduce the broth at a simmer until the broth is as seaworthy as you like. PS. If you were adding extra butter to your mussels, you could wait to melt it into the broth right after you reduce the broth.

The Value of Mussel Broth. You can only slurp up so much of the delicious mussel broth with your pasta- using a large spoon to twirl up a pasta bite with your fork and scooping in some of the broth helps- and you should never- I repeat NEVER- throw away this wonderful elixir. Having a toasted baguette is one of the best ways to make sure such a wonderful treat never goes to waste, so you should have a really good reason for not toasting one when you make these mussels. If you do have a really good reason not to make a toasted baguette for your mussel enjoyment or in the unlikely event you have broth leftover when the bread runs out, then I would hope you would freeze the cooled down broth for up to three months and use it in your next batch of mussels or to supplement future seafood soups or stews. Oh, I almost forgot- you can also just skip the pasta and serve the mussels and broth with toasted bread for a great starter as so many often do.
Do You Really Even Need A Recipe For A Toasted Baguette? Here’s Three, Just In Case. NEVER WALK AWAY FROM THE OVEN WHILE YOUR PRECIOUS AND DELICATE BREAD IS UNDER THE FLAMING HOT BROILER OR YOU WILL HAVE TO ANSWER TO THE BURNT TOAST GODS. Preheat broiler to high, with a rack set on the upper level. Simply cut a baguette in half lengthwise (or use any bread you like) and attentively toast the bread, placed directly on the oven rack, until golden or dark brown as you wish. If you want to add to the garlic power, that already comes with the dish, you can top the toast with garlic “Italian Style”, with raw garlic that gives you a rather aggressive zip, or “French Style”, with garlic butter that gives you a more tempered garlic flavor. Italian Style Toasted Baguette. Preheat broiler to high, with a rack set on the upper level. Simply cut a baguette in half lengthwise (or use any bread you like) and attentively toast the bread, placed directly on the oven rack, until golden or dark brown as you wish. Take a clove or two of raw garlic and scrape it over the toasted baguette- the cloves will disintegrate into the bread, as if you were grating the garlic into the bread, which you are, and give you a prominent garlic punch with every dip. French Style Toasted Baguette. Preheat oven to 450°, with rack in upper and middle position. Cut your baguette in half, slather each cut half with a mixture of 6 tablespoons of softened cow or plant butter and 2 grated garlic cloves. Place bread, buttered side up, on a rimmed baking sheet and toast on middle rack until it starts to brown, about 5 minutes. Switch oven to high broil, use oven mitts to move bread to top rack and and attentively toast the bread until golden or dark brown as you wish- just a few minutes or so. PS- the purpose of the two rack toasting, is to keep the garlic from burning to bitter.
© 2021 All rights reserved. Dad’s Dinner Diary
